New Goodies!
Happy Saturday Everyone! I'm really excited about our new goodies, especially our lovely new Crystal Clear Keepsake Cases! They are available in two sizes and three different styles! Perfect for ornaments, displaying your treasures, and so much more! And of course there are tons of other new goodies too. In addition to the new goods, the general Christmas Section has over 600 fabulous goodies (all on sale) and our Coffee Break Design Christmas Section is sure to inspire.
I loved playing with our new Crystal Clear Keepsake Case! Here are the supplies I used:
Small Ornate Fleur Case, It's Christmas Paper Pad, Incredi-sheets, Matte Glue N Seal, VerDay Paint Set, Tiny Fairy Angel, Art Doll Face Mold, Sculpey III White, Brass Snowflake Charm, Silver Glass Glitter, 1.5 Inch Frosted Bottle Brush Tree, 1" White Deer, Frosted Mica Flakes, Silver Faux Rhinestone Ribbon
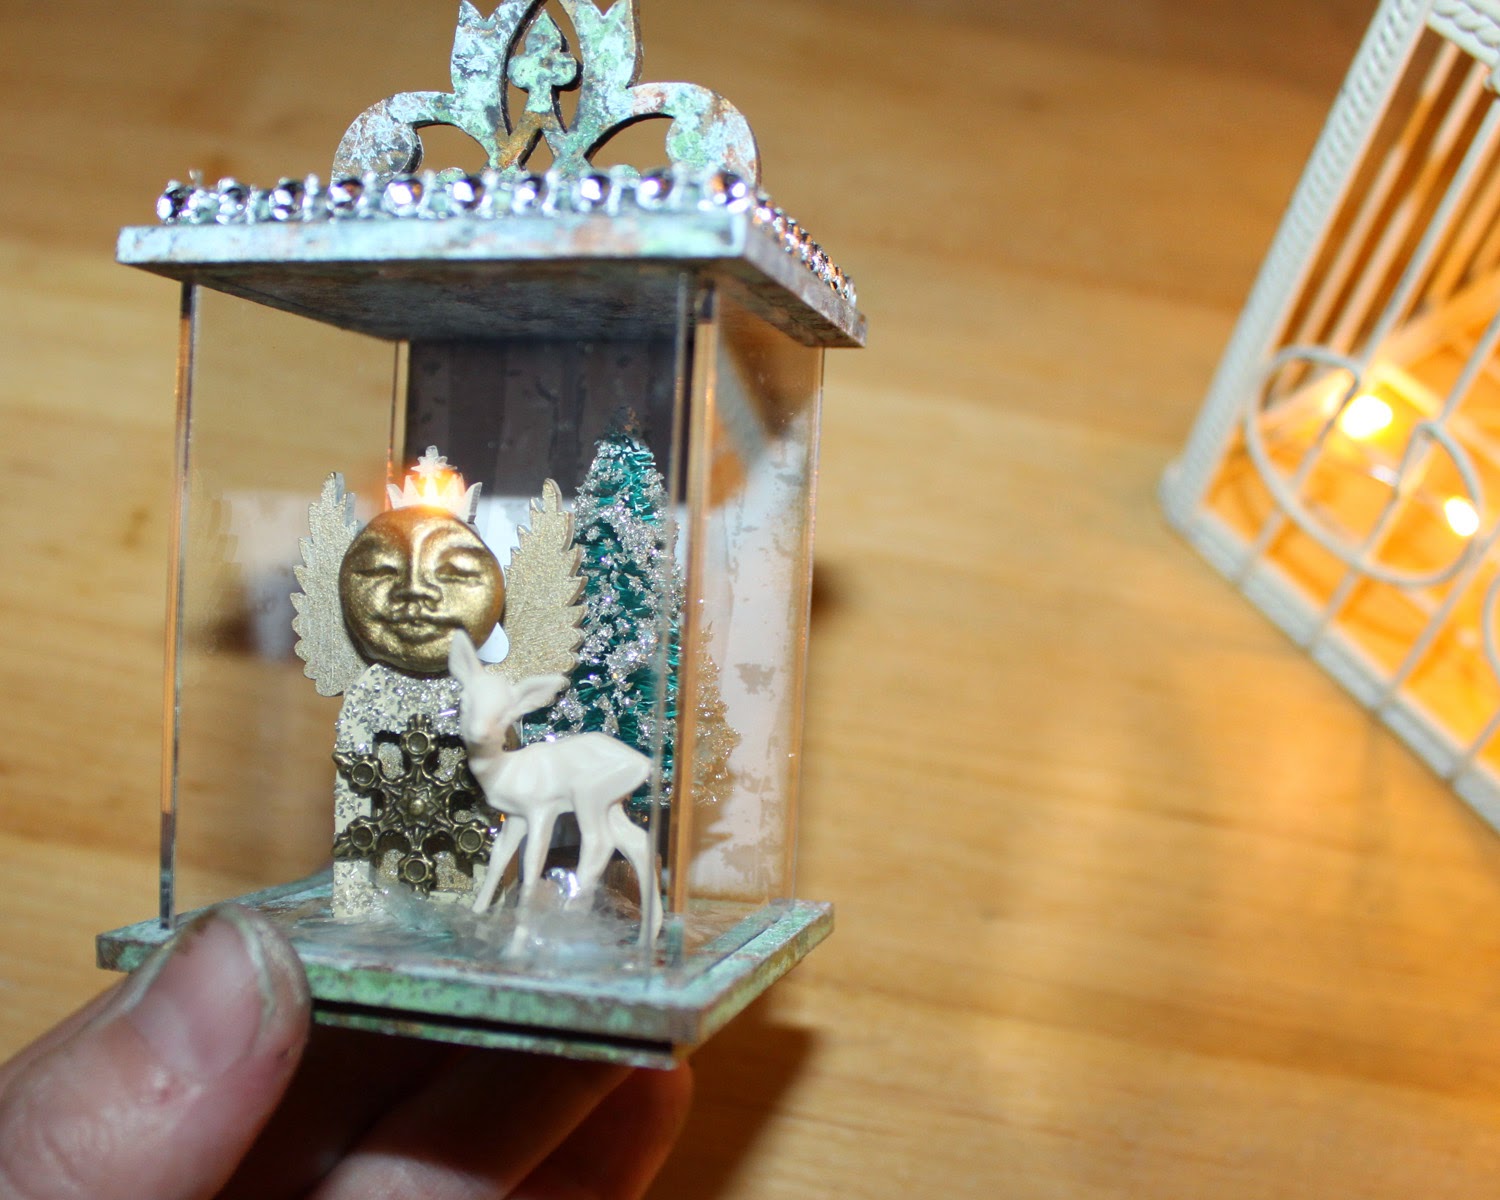
These cases have so many possibilities! I immediately knew I wanted to create a winter wonderland scene, and use mine as an ornament. I just need to add a ribbon or wire to the top!
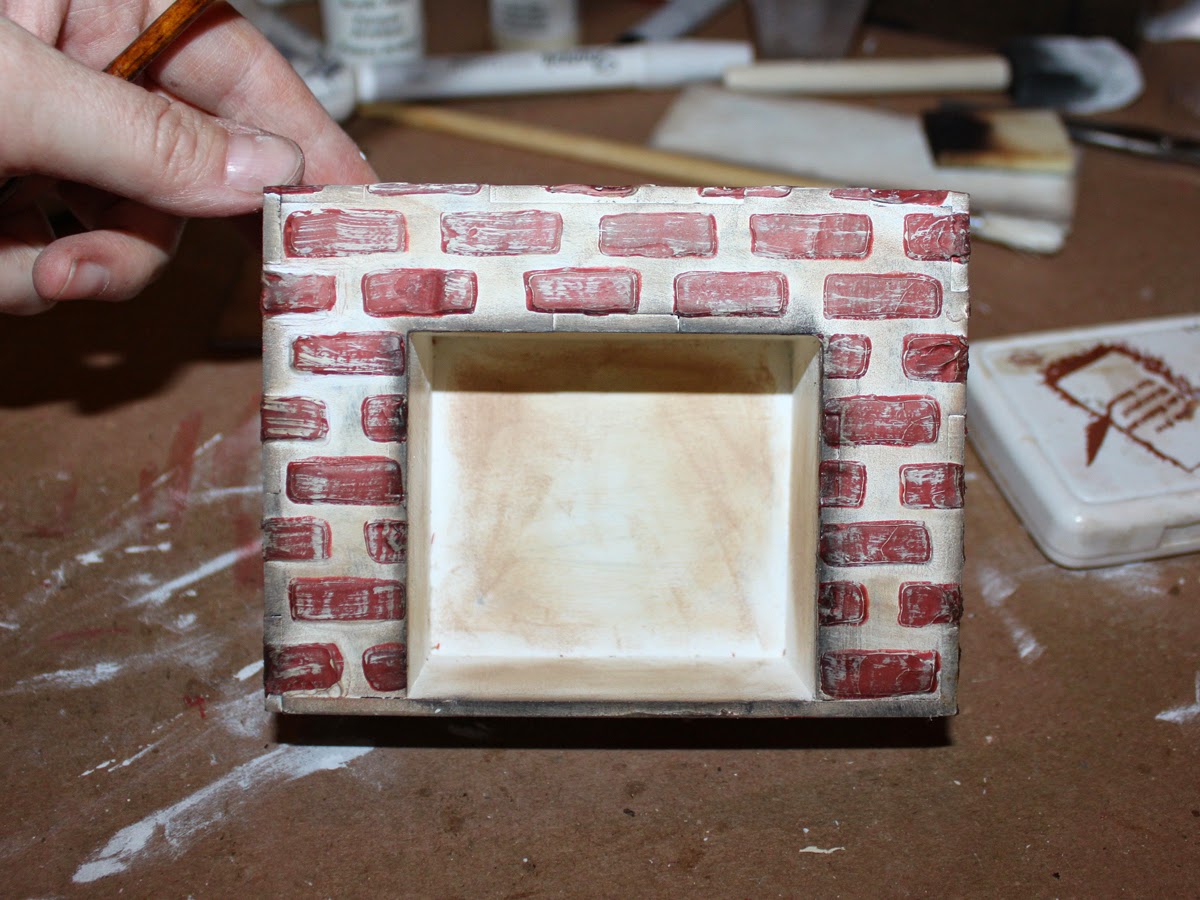
I started by using my VerDay paints on all the Masonite bits! Just be sure that you don't cover up the slots!
This is how the pieces turned out. I wanted to give them more of a frosted look, so I also added a bit of white acrylic paint, dabbed on with my brush.
Once my pieces were painted, I worked on the acrylic. Of course, you could leave them all clear, however I thought it might be cute to paper the back. You could also paper 3 of the sides as well. I was SO EXCITED when I found this tree paper. Perfect for my little winter wonderland.
Keep in mind you will be inserting your acrylic into the slots which are a perfect fit, so you will want to leave a 1/8" space on each edge. I used my acrylic as a template to cut my paper, and I simply left a 1/4" overhang before tracing. Done!
The very best way to attach paper to clear acrylic is using our crystal clear double sided tape and sheets. Incredi-sheets! It will look seamless and the bond is permanent. First I loosely cut a piece larger then my paper. Peel off one side and stick your paper to the incredi-sheet. Then cut around it. Then simply peel off the second side, and stick to your acrylic. Remember to leave the 1/8" on each end.
To glue in my sides, I put a few dabs of clear super glue on the bottom edge before inserting into the slots.
The paper I used for my background is double sided, so the back looks great too! That's the fun part about using the acrylic!
Remember those clay faces I made a few weeks ago? Well the tiniest one fit the Tiny Fairy Angel! I painted the face with gold acrylic paint, and the body of the angel with cream and gold. I added some glass glitter and a brass snowflake. She's so adorable!
Because one can never have too much sparkle, I also added glass glitter to my tree. I simply dabbed on some Matte Glue N Seal with my brush randomly, and then sprinkled the glitter over a paper plate. Don't forget to save the unused glitter. The plate makes it easy to slide the extra back into the container.
Next I glued my pieces to the bottom and added a bit of Mica. Again, I used the Glue N Seal. Dabbing it on and then sprinkling on the Mica Flakes. I also added Mica to my top after attaching. I glued in the other two sides using clear super glue.
I found it easiest to attach the top by flipping the piece over so I could see what I was doing. I used some tweezers to move the sides as needed in order to line them up with the slots. Once they were all lined up, I pressed down and it made a lovely "click" and that was that!
I finished the piece by attaching my topper and some faux rhinestone around the edge. The edge is also great for Dresden trim or real rhinestones! The edge in the design was no mistake :). When I was designing the cases I knew there needed to be an edge for bling! Ohhh... tinsel stems would be fun too!
I was also thinking the cases would be adorable mounted to a base. I would have loved to attach a vintage wooden sewing spool. Alas, I have none. The glitter is just to give you an idea :). Our box feet would be great too.
I'm loving the back and my double sided paper! A personalized photo might be nice too. Think Christmas Gifts!
It's so hard to show in photos, but between the glitter, mica, and acrylic sides, the light dances! Check out her "glowing" crown, reflected from the light to the right!
This is going to look stunning on my tree. I love the way the acrylic reflects. You can see the refection of the light in the photo, at the bottom of the deer's feet. It looks like the lights are inside! So pretty.
Inspiration By Sarah Lynch!
This sweet Dia De Los Muertos Rose Shrine is by Sarah Lynch. I love the wedding couple inside, and the mini pumpkins. Sarah gave this as a wedding present, of course! Love it Sarah!
Inspiration By Linda O'Connor!
Inspiration By Amy Nieman!
This sweet
Nature Fairy assemblage is by Design Team Member
Amy Nieman! I love how she used the
Mushrooms, and now I'm thinking they might be fun in a winter or Christmas piece. Perhaps with a bit of Mica or Glitter? So sweet
Amy! Thanks for the inspiration!
Inspiration By Denise Phillips!
Fun 2014 Christmas Tutorials!
Crystal Clear Keepsake Case. Find it HERE.
Deer Mount Ornaments. Find it HERE.
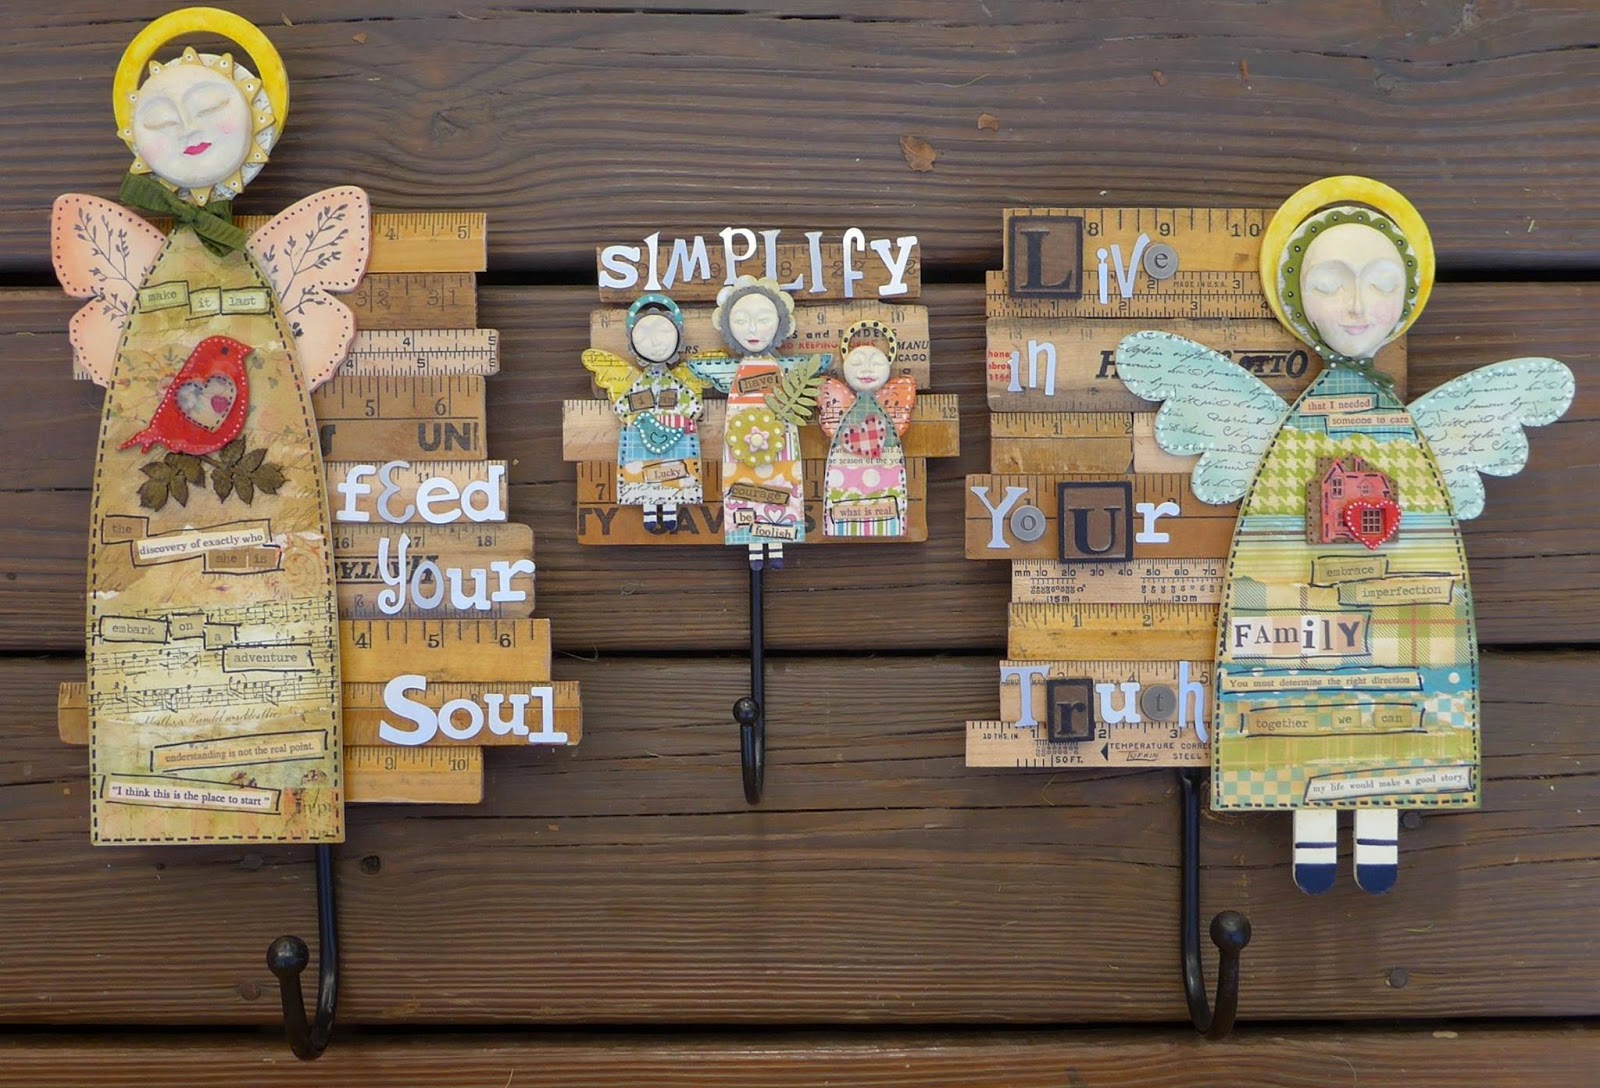
Primitive Angels. Find it HERE.
Happy Creating! xoxo Kristin